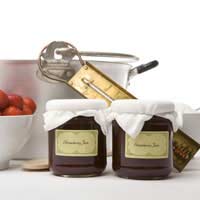
Making jam is a brilliant way to use up a fruit glut. Use your best fruit and you’ll be rewarded with glowing jars of jam, with a genuinely fruity taste, that will last for ages.
Jump To...
Jam Making for Beginners
Jam contains two essential ingredients: fruit – which provides pectin – and sugar – which preserves the fruit. Pectin is important to the jam’s set: low-pectin fruits like strawberries need extra pectin (in the form of lemon juice or pectin-enriched sugar) to reach a spreadable consistency. When choosing fruit, select pieces that are perfectly ripe and unblemished – they’ll have the best levels of pectin and the finest flavour. If the fruit needs washing, make sure you dry it thoroughly using kitchen towels, because excess water can prevent the jam from setting or cause mould on the finished jam.
What You Will Need
Jars – plenty of these! You can use a variety of methods to seal your jars. This is important because it keeps bacteria out of your jam, preventing mould from forming. One option is to buy traditional Kilner jars, which come with a rubber seal. You can also buy ordinary jam jars with metal lids – you don’t need a wax paper seal for these, as they shut tightly. The third option is to buy waxed paper and cellophane covers. When placed directly onto the surface of the warm jam, the paper creates an airtight seal – a plastic or pretty fabric cover will be fine over the top of the jar. You will also need a large pan for boiling up fruit, a wooden spoon, and some muslin or a jelly-bag if you want to strain your jam.
How to Test and Bottle Your Jam
When you’ve followed a recipe, and your fruit is simmering nicely in the pan, it will ask you to test for set. There are a number of ways to do this, but the simplest is by using a cold saucer and teaspoon. When you begin the recipe, put a couple of small saucers into your freezer. At the moment you want to start testing, remove a saucer and use a teaspoon to put a small amount of jam onto it. Leave it for a few seconds and then push the jam with your little finger (be careful!). It will wrinkle on the surface when the jam is ready. If not, try again in a minute or two with a fresh saucer. When your jam is set, turn off the heat and prepare some sterilised jam jars. Wash them in soapy water and rinse thoroughly; then place your jars into a low oven for five minutes. Handling them carefully, pour the warm jam into the jars, and seal immediately. Cool the jars at room temperature before labelling. .
Beginners Raspberry Jam
You can make raspberry jam in an oven – in just 15 minutes! Nigella Lawson says that this method is the best introduction to jam-making, although you may be disappointed to find how easy it is… Of course, the compliments that you’ll receive when you bring out a jar of homemade jam will make up for it. Just don’t give away your secrets! .
- 450g raspberries, hulled
- 450g caster sugar.
In a wide oven dish, spread out the sugar – then melt it in the oven on the lowest temperature setting. Bring it out of the oven, carefully, and stir in the raspberries. Mash them with a wooden spoon until everything is blended and now pour into sterilised jars. This jam needs to be kept in the fridge.
Strawberry and Gooseberry Jam
- 250g gooseberries, topped and tailed
- 250g strawberries, hulled
- 400g sugar 1 lemon, juiced
Put the fruit and sugar into a large pan and put over a low heat until the sugar has melted (try not to stir until this happens, and make sure it’s all melted in, because you could get crystals in the jam). Add 2tbsp of the lemon juice and bring to simmering point, letting the fruit soften and thicken. After about 10 minutes, start testing for a set – when it’s ready, bottle as above.
