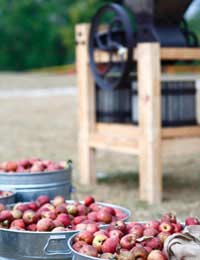
If you have a glut of apples, or if you’ve always wanted to know how to make cider, this simple guide to home brewing will tell you all you need to know. Making apple cider is surprisingly easy, although does require a lot of fruit processing.

Cider has been enjoyed for its refreshing qualities for hundreds of years. Manor houses and farms were brewing and selling cider in Somerset as long ago as 1290.
Although its popularity has had its ups and downs, for small-holders, home brewers and anyone interested in self-sufficiency, cider continues to be the drink of choice. And it’s simple to brew.
Jump To...
Cider Making Equipment
You’ll need the following re-usable equipment to make cider.
- A lidded bucket. You don’t need a special brewing bucket but you do need one that is of food grade quality.
- A demijohn, which is a glass gallon bottle.
- An airlock.
- A siphon – a piece of rubber tubing.
- Bottles for the finished product. You can re-use empty plastic fizzy drink bottles.
- A means of pulping the apples.
- A means of apple pressing.
Plus:-
- Yeast if you choose to use it. Cider yeast is available but if you can’t get it use brewer’s yeast. Keep it stored in the fridge.
- Sterilising tablets to clean the equipment before use.
- Apples
Type of Apples to Make Cider
Any dessert apples will do. Adding a few crab apples to the mix will improve the tannin content so beloved of red wine drinkers and it will also add a tartness to overly-sweet juice. You will need a good 16 pounds of apples to make one gallon of cider.
The apples need to be fully ripe. If you leave them in a cool place for a week or two the skins will soften making the pulping easier.
How to Make Apple Cider
Pick over the apples and remove any mouldy or bug-infested ones. Wash them and cut in half across the core (to make sure there are no worms inside). There’s no need to peel or core them. Chop roughly to prepare for pulping.
The environmentally friendly way of pulping involves bashing the apples in a bucket with a sledge-hammer or something equally heavy. If this sounds too much like hard work use a specially-bought fruit crusher or domestic liquidiser, although a small home liquidiser could take a long time to pulp the quantity required.
You should end up with a sludge, which is correctly called a pomace.
The next step is to press the pomace to extract the juice. How you do this depends on what equipment you can lay your hands on. You’ll definitely need some muslin or hessian in which to wrap the pomace before you squeeze it into the bucket that you’ve already sterilised according to the instructions on the packet.
The more weight you can apply the more juice you’ll be able to extract. So think creatively!
Converting Apple Juice to Alcohol
To convert the apple juice into cider you need yeast to bring about fermentation. During this process yeast works on the sugar in the juice and turns it into alcohol. Traditional cider makers rely on yeast that is available naturally in the air but you may prefer to treat your juice with a Campden tablet to kill off the natural yeast and then to add a specific wine or cider yeast so you have more control.
Whichever you choose it’s a very bubbly stage and you may find that the bubbles overflow from the bucket (the lid should be put on loosely to allow for overspill). However this stage only lasts about 2 days.
When the frantic bubbling has ceased it’s time to siphon the fermenting liquid into the sterilised demijohn using the sterilised tubing. When all the liquid is in the demijohn, insert the airlock and leave at a steady 15 degree temperature, for up to 10 weeks until fermentation is completed.
When fermentation has stopped you can siphon the cider into bottles or into another clean demijohn if you want to leave it a bit longer to settle and siphon again.
Making Perry
Got a pear glut to use up? You can use these steps to make yourself some perry (pear cider). Perry is the pear equivalent of cider. Replace the apples with an equivalent weight of pears. Ripe pears are much easier to pulp than apples.
